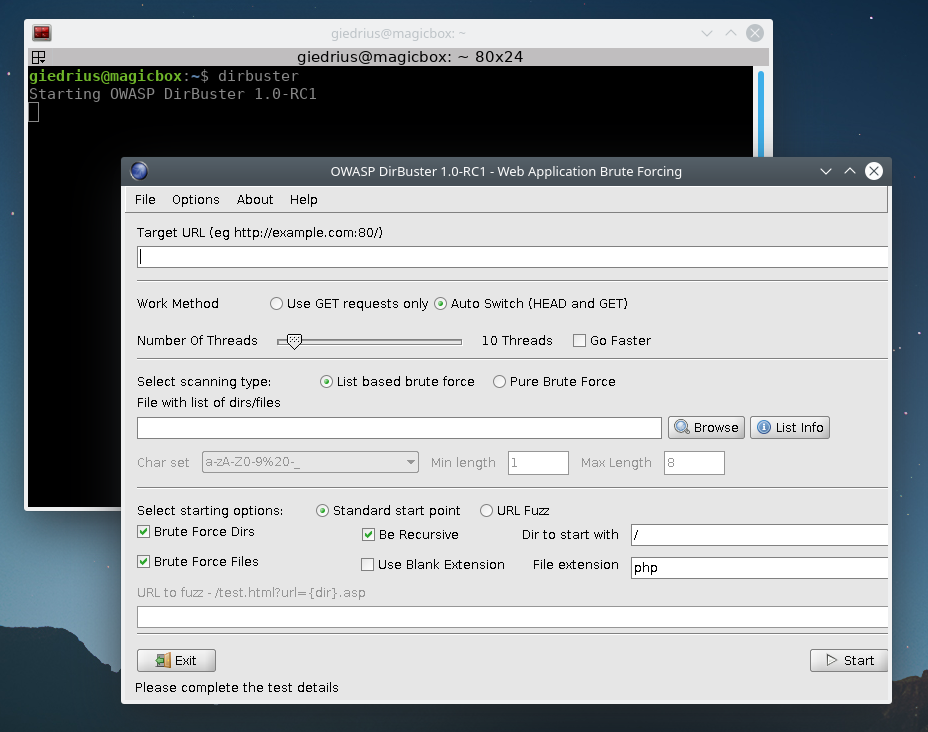
DirBuster is one of the handy tools that is used during the reconnaissance stage. It helps to discover existing directories of the system. In simple words, it is a multithreaded application for brute forcing the directories. So, basically, it works like this: you launch the DirBuster, choose a dictionary, set the target, and launch the attack. The tool then executes many GET/HEAD requests and tries to guess if a given directory or file exists on the target’s system.
Table of Contents
Who Created Dirbuster?
Dirbuster was created by OWASP, but, currently, it is an inactive project. However, with a help of the good old web archive, you can find a DirBuster project page that was originally created on OWASP website.
Currently, the project is not maintained as it was incorporated into OWASP ZAP project, however it doesn’t mean it doesn’t work. It does the job pretty well.
How to Install Dirbuster on Linux?
As the project is not maintained, it takes more than apt install to get it. DirBuster comes by default with Kali Linux, however, if you are using other distribution, such as Debian, you have to install it manually. Make sure you have everything that the installation will need:
- GIT. You can install GIT by sudo apt install git
- Java. You can check your current Java version by executing java -version. If you don’t have it installed, on the terminal you will get the instructions on how it can be installed (spoiler alert: sudo apt install default-jre).
Now when you are ready, let’s proceed.
- Clone the repository of DirBuster: git clone https://gitlab.com/kalilinux/packages/dirbuster.git
- Move the dirbuster to opt directory: sudo mv dirbuster /opt. Opt directory is for installing unbundled packages – the packages that are provided from different sources than the packages that came with the OS distribution. It’s for external, third-party packages.
- Basically, you can stop after cloning the repository. Just run the ./DirBuster-1.0-RC1.sh and you are ready to go. However, it is not convenient to navigate to the DirBuster directory and run the script manually. That’s why we moved the folder to /opt directory – to make our life easier. If you want to finish the process of making your life easier, please proceed.
- Create a new file for aliases (if you don’t have it already): sudo nano ~/.bash_aliases (I am nano guy, btw), and add a new alias to the file: alias dirbuster=’source /opt/dirbuster/DirBuster-1.0-RC1.sh’ After this, restart the terminal/ssh session or execute source ~/.bash_aliases for the changes to take effect.

This is what it should be added to the bash_aliases file
- Almost done. If you run the command dirbuster from a different directory than /opt/dirbuster, you will get an error Error: Unable to access jarfile DirBuster-1.0-RC1.jar. This is because shell script is searching for a jar file in the current directory, instead of using a full path.
- Open the /opt/dirbuster/DirBuster-1.0-RC1.sh script and change the second line to java -Xmx256M -jar /opt/dirbuster/DirBuster-1.0-RC1.jar. Now restart your terminal session and execute dirbuster in the terminal. The dirbuster should start now from any location.

It’s working! You did it!
Let’s try Brute Forcing a Target
As now we have the DirBuster installed, let’s see how it works.

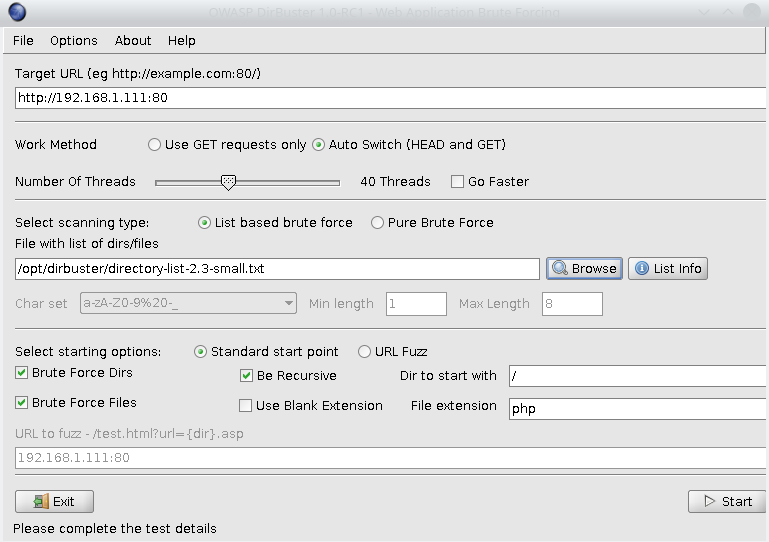
So in order to start the DirBuster you have to set a target. For this example, I have a DVWA (damn vulnerable web application) running on my network. Make sure you set the protocol and port number, otherwise DirBuster will throw an error. After that, you can set if the GET method only or HEAD and GET should be used, number of threads, that basically describes how fast the tool will go. Next, you should choose a dictionary that will be used for brute forcing. DirBuster comes with different dictionaries. Here I copied the list that you can get by clicking on the List info button (refer the screenshot above):
- apache-user-enum-1.0.txt (8916 usernames). Used for guessing system users on apache with the userdir module enabled (Unordered).
- apache-user-enum-2.0.txt (10341 usernames). Used for guessing system users on apache with the userdir module enabled (Ordered).
- directory-list-2.3-small.txt (87650 words). Directories/files that were found on at least 3 different hosts.
- directory-list-2.3-medium.txt (220546 words). Directories/files that were found on at least 2 different hosts.
- directory-list-lowercase-2.3-small.txt (81629 words). Case insensitive version of directory-list-2.3-small.txt.
- directory-list-lowercase-2.3-medium.txt (207629 words). Case insensitive version of directory-list-2.3-medium.txt.
- directory-list-1.0.txt (141694 words). Original unordered list.
- directories.jbrofuzz (50000 words). Case sensitive list from the OWASP JbroFuzz Project. Explicit words have been removed.
- directory-list-2.3-big.txt (1273819 words). All directories/files that were found.
- directory-list-lowercase-2.3-big.txt (1185240 words). Case insensitive version of directory-list-2.3-big.txt
You are free to use your own dictionary. Here is a GitHub repo with some wordlists.
After choosing if you want to brute force the directories, files, or both, and setting some of the other parameters, you are ready to go.
Pro tip: before starting the scan, decide if you want it to be recursive. If you have a dictionary of 200k words, and you find 20 directories, the same dictionary of 200k words will be used against the directories. So there will be millions of requests. And if each of the 20 directories has some other subdirectories…
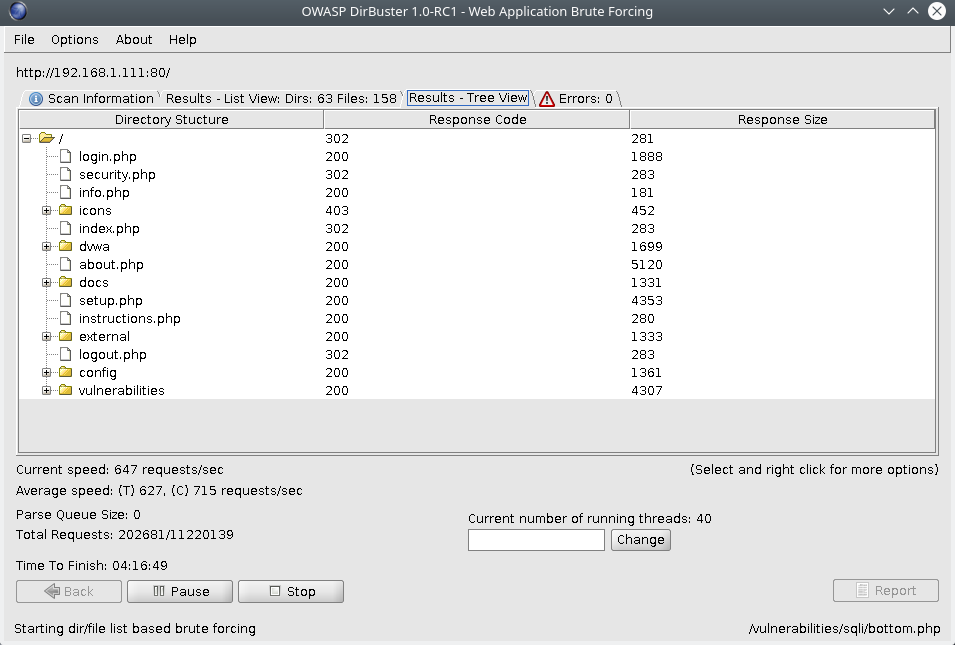
After running the scan for a couple of minutes, I got the first results. There are different reults tabs: results – list view (shows a list of found directories), results – tree view (display a tree view. Refer the image bellow).

In the Scan information tab, you can see the progress of the scan. And if you choose a recursive scan, you can stop brute forcing some of the found directories.

Now when the scan is running you can leave it to finish, you can stop or pause it.
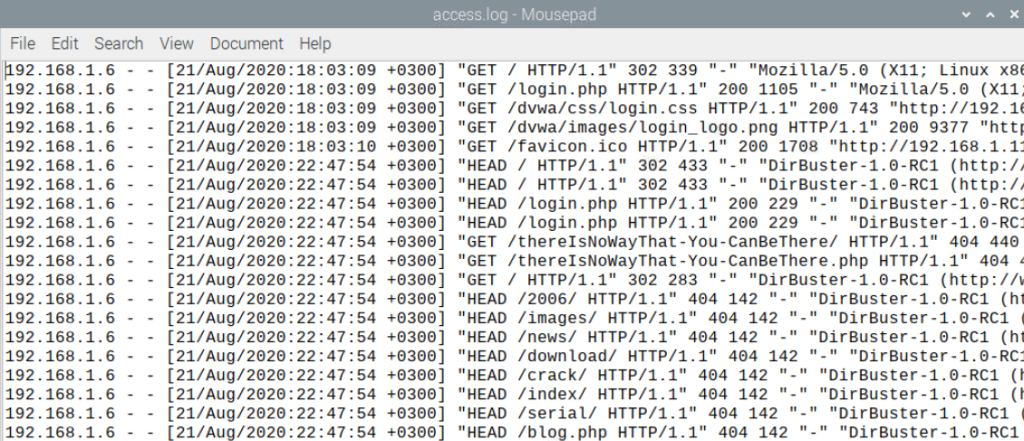
The image below shows the Apache logs from the system that was scanned with DirBuster. You might see, that scanner mixes HEAD and GET requests and uses the words from the dictionary.

DirBuster Alternatives
Of course, DirBuster is not the only tool for directories brute forcing. Here are some other:
- Dirstalk – a brute force tool that is built with Golang
- Dirseach – another popular tool. Built with Python
- Wfuzz – this one is also a pretty popular tool (3k GitHub stars), that is built with Python. The community loves Python, don’t they?
- Gobuster – Golang again.
All of the tools are different and have their strong sides. Make sure you’ve tested them all and you’ve found the one that works the best for you.
Caveats of DirBuster
These are the disadvantages of DirBuster that I personally noticed:
- It is very “noisy”. Imagine, if you have a dictionary with hundreds of thousands of directories. And if you choose a recursive scan, it tries the same dictionary on the found directories. In this way, a huge number of requests will be performed. As the number of the requests potentially could rise up to millions, system administrators will know what you are doing. Just imagine this – you came at the middle of the night with a hammer, and start dodging doors. Everyone at the home will awake. Also, there might be WAF (web application firewall) that will start blocking your requests. And of course, you might disrupt the service with an extensive amount of requests.
- When there are many error responses, by default Dirbuster stops brute forcing. So, if you loaded a big dictionary and left the Dirbuster running for a night, tomorrow morning you might be upset after realizing the Dirbuster stopped brute forcing minutes after you left it running.

Highly passionate about cyber security (penetration testing, bug bounty hunting, cybersecurity in general), and blogging. I am experienced in vulnerability assessments, penetration testing, various security audits, had worked with various clients, most of them were in finance sector.
CompTIA Security+, CEH, CEH Practical, CEH Master, and OSCP certified.


