WordPress security without a doubt is a serious concern. According to the statistics, 41.1 % of the websites on the internet uses WordPress. Cybersecurity company Sucuri says that, in 94.23% of the CMS infection cases of their clients, WordPress was used. As the security of WordPress is one of the key improvements areas for the owners., this tutorial covers WP Fail2ban installation and the first steps – configuration of the plugin, and the filters.
Keep in mind that it is an overview of a WordPress plugin fail2ban and not the configuration of Fail2ban for a WordPress server. Of course, both of the security controls are needed for improving WordPress security. But the thing is, that often WordPress installation is deployed on shared hosting. And the user of shared hosting has very little control over the server, the hosting provider takes care of everything, except the application and the application’s data. If you have the possibility to install and configure fail2ban for a server, you will have more freedom on adding custom filters.
Table of Contents
What is WordPress fail2ban and why should you use it?
WP fail2ban is a plugin for WordPress that provides the usual “fail 2 ban” functionality. To be specific, it detects brute force attempts and modifies the firewall rules dynamically to block further unsuccessful attempts. This is one of the “must-have” security plugins for WordPress. The plugin also works as the WordPress fail2ban DDOS protection.
Fail2ban works by simply analyzing the syslog for any indicators of brute force. If there are some, it takes the action to stop the attack.
WP fail2ban – advanced security plugin that you need?
Before beginning it is important to stress this out – WP fail2ban delivers one function only – it protects your website from brute force attacks, DOS, and spam. It is not all in all security solution for WordPress.
There are plenty of security plugins for WordPress. But what is the best WordPress security plugin? Some of the plugins provide firewalls, malware scanning, backups, anti-spam, and brute force protection. There are at least a few bigger security plugins that provide all-in-all security package.
But do you really need that?
Every active plugin decreases the loading time for your website. If you have a simple blog with all the “standard” plugins that are being kept up-to-date, you might not even need malware scanning. Even though I am always the person that carries the security flag, overkill security mechanisms that are not configured properly can make more harm than good. Some of the premium security plugins have many features, that require time and knowledge for configuring them.
Before making a decision if you need anything more than WP fail2ban, ask yourself what would be the consequences of getting hacked. If you are dealing with personal data, you should take security very seriously. If you are an owner of a medium-size blog, in case it gets hacked, it might become injected with spammy links, but it can be easily restored from a backup on a fresh WordPress installation. This would not be a big problem if you were doing periodic backups. Unfortunately, the consequences might be worse if the website disposes personal data.
Some of the premium security plugins provide good value, but not everyone affords to pay for the security plugins. If you have a small to medium size website that focuses on content, WP fail2ban is a great additional security control, if:
- You use only trustworthy plugins with a high number of downloads.
- You use a strong password for the administrator account and keep all the plugins and WordPress installation updated.
With good security habits plus fail2ban on WordPress, you might prevent many attacks from script kiddies.
How to install and activate fail2ban on WordPress
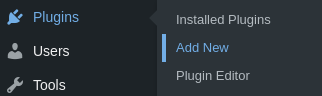
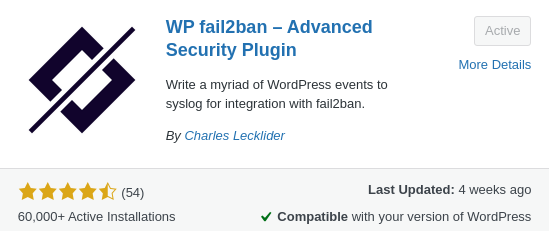
Like with any other plugin, this one can be found on WordPress plugins list. Go to the Plugins > Add new, from the wp-admin panel and search for “wp fail2ban”.
The one you need is created by Charles Lecklider.
After the installation and activation, you should see a new section on the WordPress admin menu panel.

The plugin has Bronze and Silver premium plans that would make the configuration much easier. Paid plans comes with:
- Configuration UI.
- Event log.
- Dashboard widgets.
- Report with events grouped by country or by registered events.
- Third-party integration
- Comment, spam logging,
- … and so on.
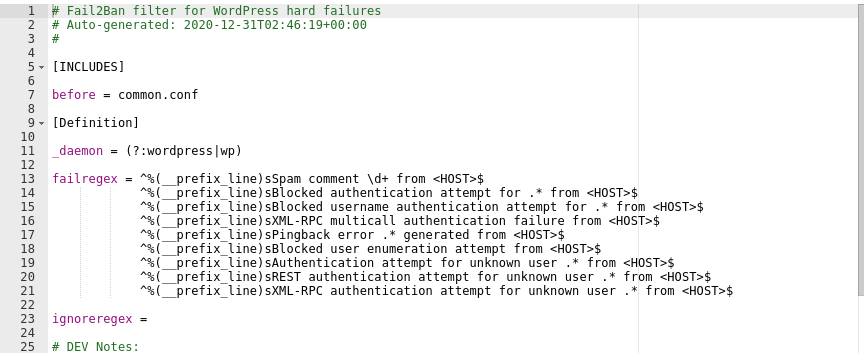
After the installation, of free version, there are three filter files created. You can find them in the plugins/wp-fail2ban/filters.d directory of your WordPress installation:
- wordpress-extra.conf
- wordpress-hard.conf
- wordpress-soft.conf
This is how the wordpress-hard.conf filter looks like:
With the free version, you will have to manually edit the wp-config file and define the constants in order to make any configurations. Even though it requires some technical work if you want to modify some of the features, the free version does the same as the paid plan does – prevents brute force attacks.
After activating the plugin, a new section should occur on the WordPress dashboard.
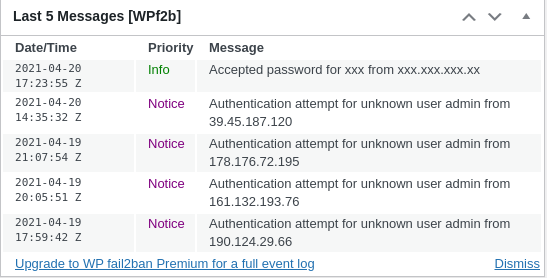
By the way, the website that the fail2ban was tested on, is just a few weeks old and is not fully indexed by the Google yet. But it still has a few unsuccessful login attempts. This shows that bots are constantly probing the internet, and plugins like this one are crucial.
One of the biggest disadvantages of the free version is that a limited number of events (only 5) are displayed on the dashboard. Even checking the logs daily, you won’t probably notice all the recent unsuccessful requests.
Adding additional filters for fail2ban on WordPress
There are a few quick filters that will make the brute force protection of your WordPress website even better. You can check all plugin’s filters in the official documentation. Right now we will gonna review a few of them.
Keep in mind that if you use shared hosting, you might not have the possibility to edit the fail2ban filters. The fail2ban is installed on the OS the WordPress is running on. What you might only have control over, is the WP fail2ban, which is a plugin that is being explained in this tutorial.
WP_FAIL2BAN_BLOCKED_USERS
While the brute force protection will prevent dumb login attempts with username “admin”, attacks of such bots will generate a significant load. In order to be protected in case of a high scale brute force attack, you can set a regex for WordPress logins. If the regex matches, no request will be made to the database.
This filter, added to the wp-config.php file will block all attempts logging in with usernames such as admin, Admin, aDmIn, user, uSer, and so on:
define('WP_FAIL2BAN_BLOCKED_USERS', ['^admin$', '^user$']);
WP_FAIL2BAN_LOG_COMMENTS
You can use the plugin for logging comments. In case this filter is activated comment ID and IP will be written to the logs:
define('WP_FAIL2BAN_LOG_COMMENTS', true);
WP_FAIL2BAN_BLOCK_USERNAME_LOGIN
Another filter that might come handy is disabling loging in with the username. Instead of it, you will have to use the email. While this might come handy, if the attacker can figure out your email, in way way or another, the risk still exists.
define('WP_FAIL2BAN_BLOCK_USERNAME_LOGIN', true);
Conclusion
If you are not that technical, you might consider buying the paid version of this plugin. Configuring filters for WP fail2ban will become just a mater of ticking boxes on the dashboard.
Also, it is worth keeping in mind, that even the security mechanisms like the WP fail2ban are configured, they do not provide any assurance that the system is secure. System owner should constantly audit the logs in order to notice any attempts of the attacks. Only by constantly auditing your website for outdated components or any weaknesses you can be sure that there are no easy ways of hacking into your website. By eliminating low hanging fruits, you can prevent many of the attacks. But overall, the plugin provides WordPress fail2ban DDOS and brute force protection, so is one of the “must-have”.

Highly passionate about cyber security (penetration testing, bug bounty hunting, cybersecurity in general), and blogging. I am experienced in vulnerability assessments, penetration testing, various security audits, had worked with various clients, most of them were in finance sector.
CompTIA Security+, CEH, CEH Practical, CEH Master, and OSCP certified.